Grill Nation

All Griller. No Filler. 100% BBQ.

  • Home
  • About
  • Contact

Custom Backyard Platform for Karubecue KBQ C-60 Pit

September 26, 2017 By Ms. K

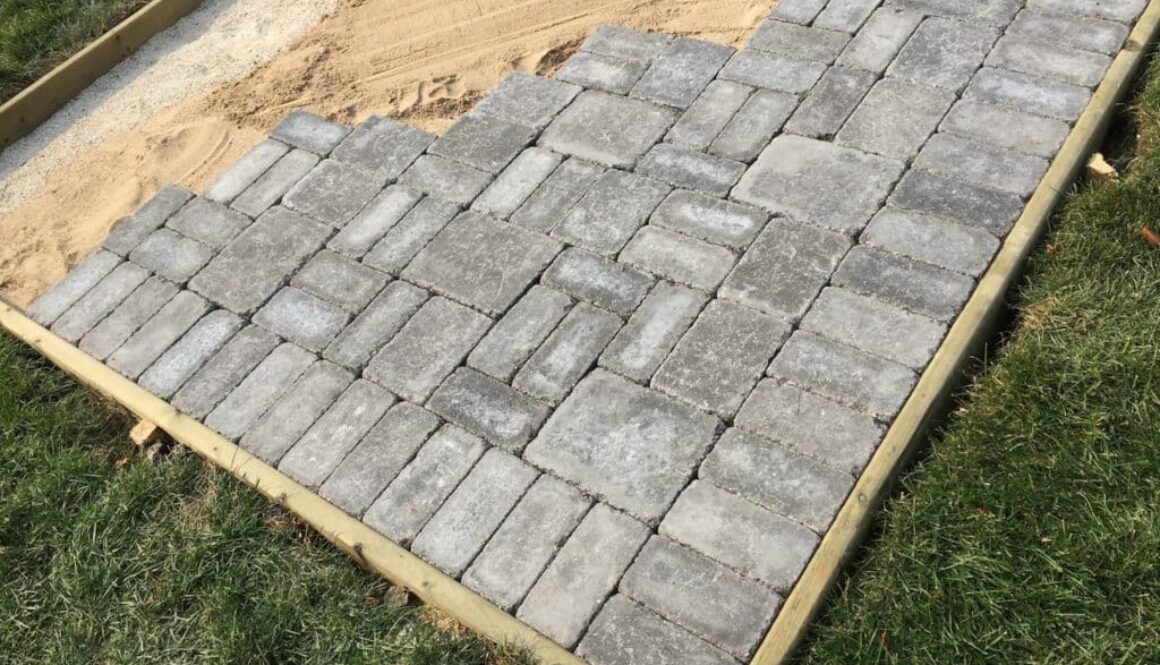
So, we love our Karubecue KBQ C-60 Pit and also like having a not-burned-down wooden deck. This summer, in anticipation of KBQ smoker goodness, we had a stone platform constructed where we can safely use this wood-burning wonder for hours and hours. And, it looks great – don’t ya think?

No, this is not an archaeological dig. (Maybe barbecuelogical.)

Custom BBQ Platform Step 1

Getting things on the level…

Custom BBQ Platform Step 2

Ingenious pattern devised by a brilliant 17-year-old mind (after applying much-appreciated 17-year-old muscle to the excavationary details…)

Custom BBQ Platform Step 3

Cool stones that are going to weather years of bbq to come…

Custom BBQ Platform Close Up

Almost there…

Custom BBQ Platform Step 4

Pit platform perfection!

Inaugural rib fest. Totally. Worth. It.

Karubecue in Action on Custom Platform

Filed Under: Love Your Meat Tagged With: backyard smoker, bbq, Karubecue, KBQ C-60 Pit

PK360 Grill and Smoker Unboxing

July 6, 2017 By Ms. K

PK360 is Here!

Our Summer of Grill keeps getting better and better! We just received our awesome new PK360 Grill and Smoker – the newest iteration of the popular PK (“Portable Kitchen”) Grill. We were attracted to it for the ability it’s going to give us to set up different cooking zones at the same time (‘cooler’ on one side for slow and low, and ‘hot as heck’ for searing) and its smart ash clean up design (more below). Plus, we were able to take advantage of a sweet Father’s Day discount and scooped up some accessories and bonus gourmet rubs as well. Check out our little ‘unboxing gallery’ here and get inspired…


Well-Packed PK360 Grill and Smoker

Funny how the most durable, least fragile things are packed so well (!)…not that we’re complaining. Everything arrived in super shape. Two of us made lifting some of the heavier items out of the box a tad more convenient.


Some High-Quality Parts!

You’ll be immediately struck by the high-quality cast aluminum capsule. A work of smoker art — and hard to imagine ever having to replace it.


PK360 Parts and Bonus Toys

We went a little grill-happy and added some accessories, like the rib rack (in the orange box), the high-quality cooking utensils (they come with convenient hooks for attaching to the shelves when not in use). We’re especially excited about the The Great Scrape Woody Paddle (pictured to the left of the capsule) which we’ll use for cleaning the grates. It’s just a flat panel now but it will ‘groove’ as we scrape the grate clean, conforming to the exact size of the wire racks over time (for cleaning those nasty nooks and charred cling-ons).


Assembling the parts…

Working some assembly magic with an allen key…


Coming together…

The instructions were easy to follow and the unit quickly came together…


Assembled and Ready to Grill!

A beauty…almost there! BTW, above you’ve got a good shot of the 4-point venting system ‘controls’. Note the circular vents on the top of the lid (that’s one and two); you control vents found inside the bottom of the capsule with the two round black dials under the unit (that’s three and four).


Removable Black Durabilium Shelves – Comes Standard with PK360

Two black ‘durabilium’ shelves come standard with the PK360 to provide a handy prep/food staging surface.  The shelves can be removed if you want to lift the capsule off the stand and haul it somewhere (remember, PK= “Portable Kitchen”). We’re considering upgrading to the PK360 Teak Shelves – in our view a bit more attractive – but frankly the standard shelves look and work just fine. (On our first few grillings, we thought we dedicated a hint of plastic smell resulting from the high heat of the capsule, but it seems to be going away with more use.)


Convenient Hinged Grid

The hinged grid is ‘grate’ (groan.) Seriously, you can easily lift it with tongs while cooking when you need to make adjustments to the coals without doing contortions over fire. And it stays propped up on its own (as you see pictured) so it won’t flop onto your meat.


Raised Vents to Control Internal Airflow

These raised vents (shaped like little ‘volcanoes’, in the bottom of the capsule) are just plain smart… You top them with the ‘lid’ show above that hovers just above the openings on the legs on either side of the hole – this protects your deck or patio or wherever you’re cooking from ash falling through the bottom while still letting air circulate from the bottom of the grill. You control the degree to which the holes are open with dials on the front of the grill, and as we showed you above, you also have vents in the lid of the capsule. (In the picture below, you’ll see that there are two ‘rows’ of vent holes. )

Check out this great features overview demo video at pkgrills.com showing off the 4-point vent system.


Manage Ash for Convenient Clean Up

As notes, your vents are protected from the ash during cooking. This ‘plug’ is where you can push all the ash and dump it into a bucket or bin when you want to clean up. Super easy.


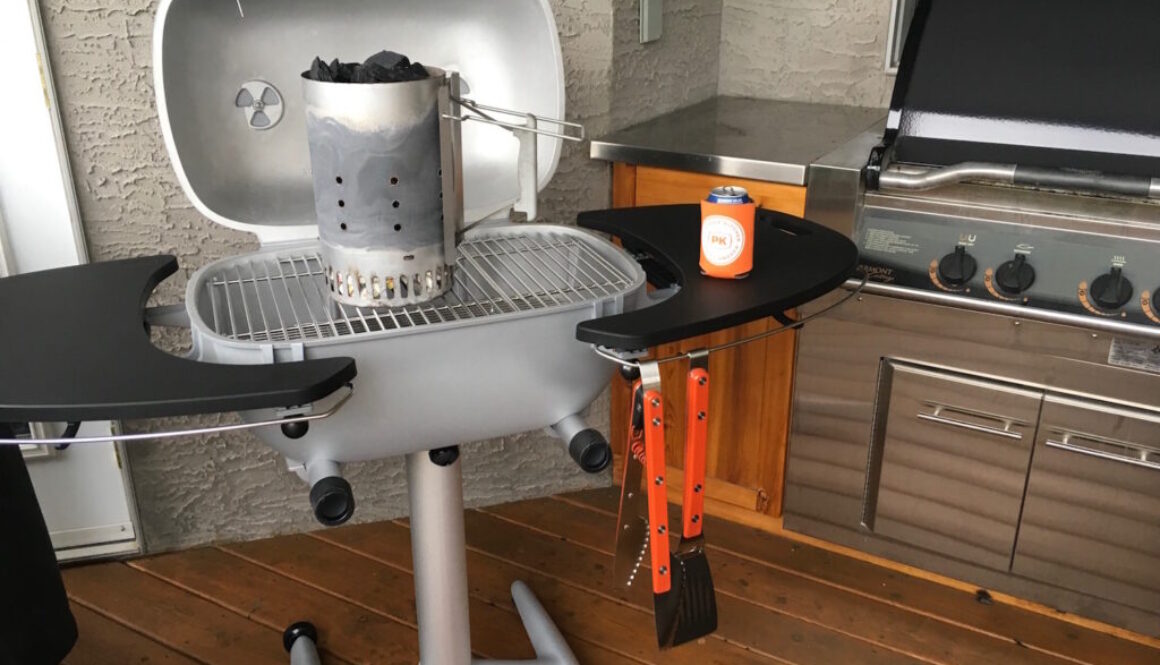
PK360 Lighting the Coals with Weber Rapidfire Chimney Starter

We lit things up for our first PK360 meal (rib-eye steaks) with our Weber Rapidfire Chimney Starter. Watch for more on the PK360 – amazing griller/smoker so far.


More info:

Want to buy one now? Go right to the PK360 page on the official PKGrill site.

Or visit www.pkgrills.com for detailed information.

-Ms. K

Filed Under: Buyer's Guide Tagged With: bbq, charcoal grill, PK360 Grill and Smoker, smokers, Weber Rapidfire Chimney Starter

Get Your Grill On: 5 Keys To Grilling Success

January 17, 2009 By Chip Carter

Brats on the Grill at a Tailgate PartyWhether you’re a raw rookie behind your first grill or a seasoned veteran who can execute perfect 90 degree grill marks in his sleep, you’ll love the Grill Nation Game Plan where I lay down Grill Nation’s 5 Keys To Grilling Success. So pour yourself a little of what you like and read on…

1. Know Your Heat/Know Your Meat

Choosing Direct vs. Indirect heat is critical. As a rule, I like to use the Indirect Method when doing foods that require more than 20-25 minutes of grilling time. Whole chickens, turkeys, beef roasts, pork roasts and ribs are simply better when done this way. Direct Heat is best used for foods with total grill times of 20-25 minutes or less, and produces those classic grill or char marks that grillers love. Steaks, chicken breast, sausages, brauts and grilled vegetables are usually done this way. For a more detailed discussion see Chip Carter’s January 15th 2009 post – Gimme Fuel Gimme Fire: Direct vs. Indirect Heat.

2. Pregame=Preheat

Whether you played Pop Warner football, High School hockey, or Collegiate hoops, you had a pre-game ritual. You probably still do! Grilling is no different, and before that soon-to-be-perfect steak hits the grill, make sure your grill is preheated and that the temperature is steady. Preheat times depend on your grill itself, desired temperature, and environmental factors, but giving your gas grill 15 minutes to reach a steady state is good starting point. (Of course charcoal grillers have a different challenge – but we will save that for another day!)


3. Timing Is Everything

I can’t stress the importance of using a timer enough. Think of it as your game clock. As a general rule, meat that is grilled using Direct Heat should be turned only once and this should occur when you reach half your total grilling time. So, for example, on my grill a 1 inch New York Strip done over Medium/High Direct Heat takes about 8 minutes (medium rare) and should be flipped at the 4 minute mark. I don’t know about you guys, but when I’m grilling, there’s usually lots of distractions – having a countdown timer with an alarm keeps me tuned in. Ever seen a football game when the 40 second clock fails? Exactly.

4. Take A Temperature

Get a good meat thermometer and use it. Bottom line. All sorts of methods are out there for determining doneness and in my opinion none of them come without a cost. Cutting into meat while grilling causes tasty juices to be lost and just plain doesn’t look slick. Trying to compare the feel of the meat to the fleshy part of your hand at the base of your thumb? Come on, really. Does that make any sense? Get a good meat thermometer and use it. Most recipes will tell you what your target internal temperature is and after a few reps you’ll never be without one.

5. Pitch A Tent and Let It Rest

Once your culinary masterpiece comes off the grill, cover it with an aluminum foil ‘tent’ and let it rest 3-5 minutes. Resting allows the juices within the meat to redistribute evenly throughout so that they are not lost after the first cut. Do not wrap the meat in foil – in fact its best if the foil does not touch the meat at all.

I hope you find Grill Nation’s 5 Keys to Grilling Success helpful. They’re part of my Game Plan every week! And yes, my fantasy team crashed and burned (see Timing Is Everything: Grillers on the Clock) but March Madness and redemption are just around the corner!

Thanks for playing,

Kevin Pearson

Filed Under: Grill School Tagged With: bbq, beginner, grilling, learning, preheat, technique, temperature, tenting, thermometer, timing

Gimme Fuel, Gimme Fire: Direct vs Indirect Heat

January 15, 2009 By Chip Carter


Heat Drama and Grillin

Every griller knows how important the heat from the burner or the charcoal is to that perfect steak – and to be honest, the beautiful part about grilling is the simplicity. But for those who want to expand their grilling horizons – you’ll be richly rewarded if you understand the different approaches to heat, as described below. And remember: whether you use charcoal or gas grills, direct or indirect heat – always grill with the lid down!

Direct Heat

To grill using Direct Heat, place your food on the grill directly over your grill’s source of heat. Turn the food once, when you are halfway through the total grilling time. DO NOT FLIP OUT!! I’m not a fan of multiple turns or flips – this result in unnecessary heat/cool cycles and produces inconsistent results. Not good. Anyway, Direct Heat is best used for foods with total grill times of 20-25 minutes or less, such as steaks, chicken breast, sausages, brauts and the like – not to mention your grilled veggies.


Indirect Heat

When you think indirect heat, think convection oven, but with way more flavor and way more fun!!! Heat rises from the heat source and bounces off the grill lid and surfaces, slowly and evenly cooking food from all sides. To grill using indirect heat, make sure food is not placed directly over your grill’s heat source. With charcoal this can be accomplished by placing charcoal under both sides of the charcoal grate. I like to separate the sides by placing a drip pan in the middle. On a gas grill, preheat the grill using all burners and once you’ve reached your target temperature, shut off your middle burner(s) directly under the food. Adjust the burners on each side of the food accordingly.

Don’t have multiple burners??? No worries – check out ‘Grill Gear’ section for the necessary upgrades you need my friend!

I like to use indirect heat when I’m doing foods with more than 20-25 minutes of grilling time. If you use indirect heat, you’ll soon find that doing whole chickens, turkeys, beef roasts, pork roasts and ribs becomes a tender and juicy snap.

DO NOT FLIP YOUR LID! – Ok, this may be a little harsh, feel free to open the lid to baste, and to check for doneness, but otherwise keep that lid closed, valuable heat gets lost and throws off your cooking time every time that lid pops!

Whatever method you deploy – be sure to tell us your grilling stories, share your secrets if you want, including pictures of your grilling spread on the Grill Nation forums!

Until next time,

Chip

“Gimme Fuel Gimme Fire – It’s The Grill That I Desire”

Filed Under: Grill School Tagged With: bbq, direct heat, grilling, indirect heat, temperature

Timing is Everything: Grillers on the Clock

January 14, 2009 By Chip Carter

Timing Is Everything

I believe it was the great Vince Lombardi who once said (and I expect to be corrected by one of my fellow grillers out there if I’m wrong) “…we didn’t lose, we just ran out of time…”.

The importance of timing in the game of football simply cannot be debated. Whether we’re talking about the play clock, the 40 second clock or the internal clock in a quarterback or a receivers head. “One thousand, two thousand, etc, etc.”


Timing is everything. Including in the great pursuit of that perfect grilling experience. I know, I know, you’re thinking that this Monday morning quarterback just can’t let Sunday go (did you see Denver go for two to win with seconds left against the Chargers instead of kicking the PAT – that’s chutzpah, but I digress…).

There’s method to my madness here. While we wouldn’t think of going onto the gridiron without the clock, we shouldn’t go onto the grill without the clock either. Bottom line – A timer should be an essential weapon in your grilling arsenal, plain and simple. Digital or analog, count up or count down, bells and whistles or vanilla – get one. Unlike the average football play which lasts only seconds, most grill times last considerably longer – so even Peyton Manning’s internal clock won’t get it done here!!!

Not only will a timer improve your grilling consistency under ideal conditions, but you’ll adapt better to whatever your grilling menu and mother nature throws at you! Its an inexpensive, simple grilling innovation that will elevate your game without creating a salary cap nightmare. If only things were this easy for my fantasy football team (can you say Tom Brady…).

Filed Under: Grill School Tagged With: bbq, grilling, timer, tips

Advertisement


Recent Posts

U10 Shrimp With The Spice House Caribbean Calypso Seasoning

We were feeling summery tonight, so large, meaty seafood with a citrusy-spicy … [Read More...]

  • Winter Cookery: The Thermal Jacket for the Yoder YS640s
  • Baby Back Ribs on Yoder Smokers YS640S Smoker
  • Pork Shoulder on the YS640S Yoder Smoker

Follow us online

  • Twitter


Copyright © 2022